-
- Make sure your oasis (floral foam) fits the rectangular receptacle for your centerpiece. Set your oasis in a basin or sink full of water. Let it soak for about 15 minutes. Flip it over in the water just to make sure it is fully hydrated. Resist the urge to poke your oasis down into the water. That will close off any air openings remaining; air openings that help your flowers last longer.
-
Remember, this is YOUR vision so enjoy yourself. We just thought that instructions may be of help if you’re in a rush.
HERE WE GO!!
-
The image that you are creating wants to be beautiful from all sides, since this will probably sit in the center of your table, and everyone will be able to see it from some angle. The norm is to keep the centerpiece shorter than 12 inches high from the table top so that everyone can see over and easily converse. Having one or two flowers, or a piece of foliage standing taller than that works just fine because you’re not creating a hedge through which one must speak.
-
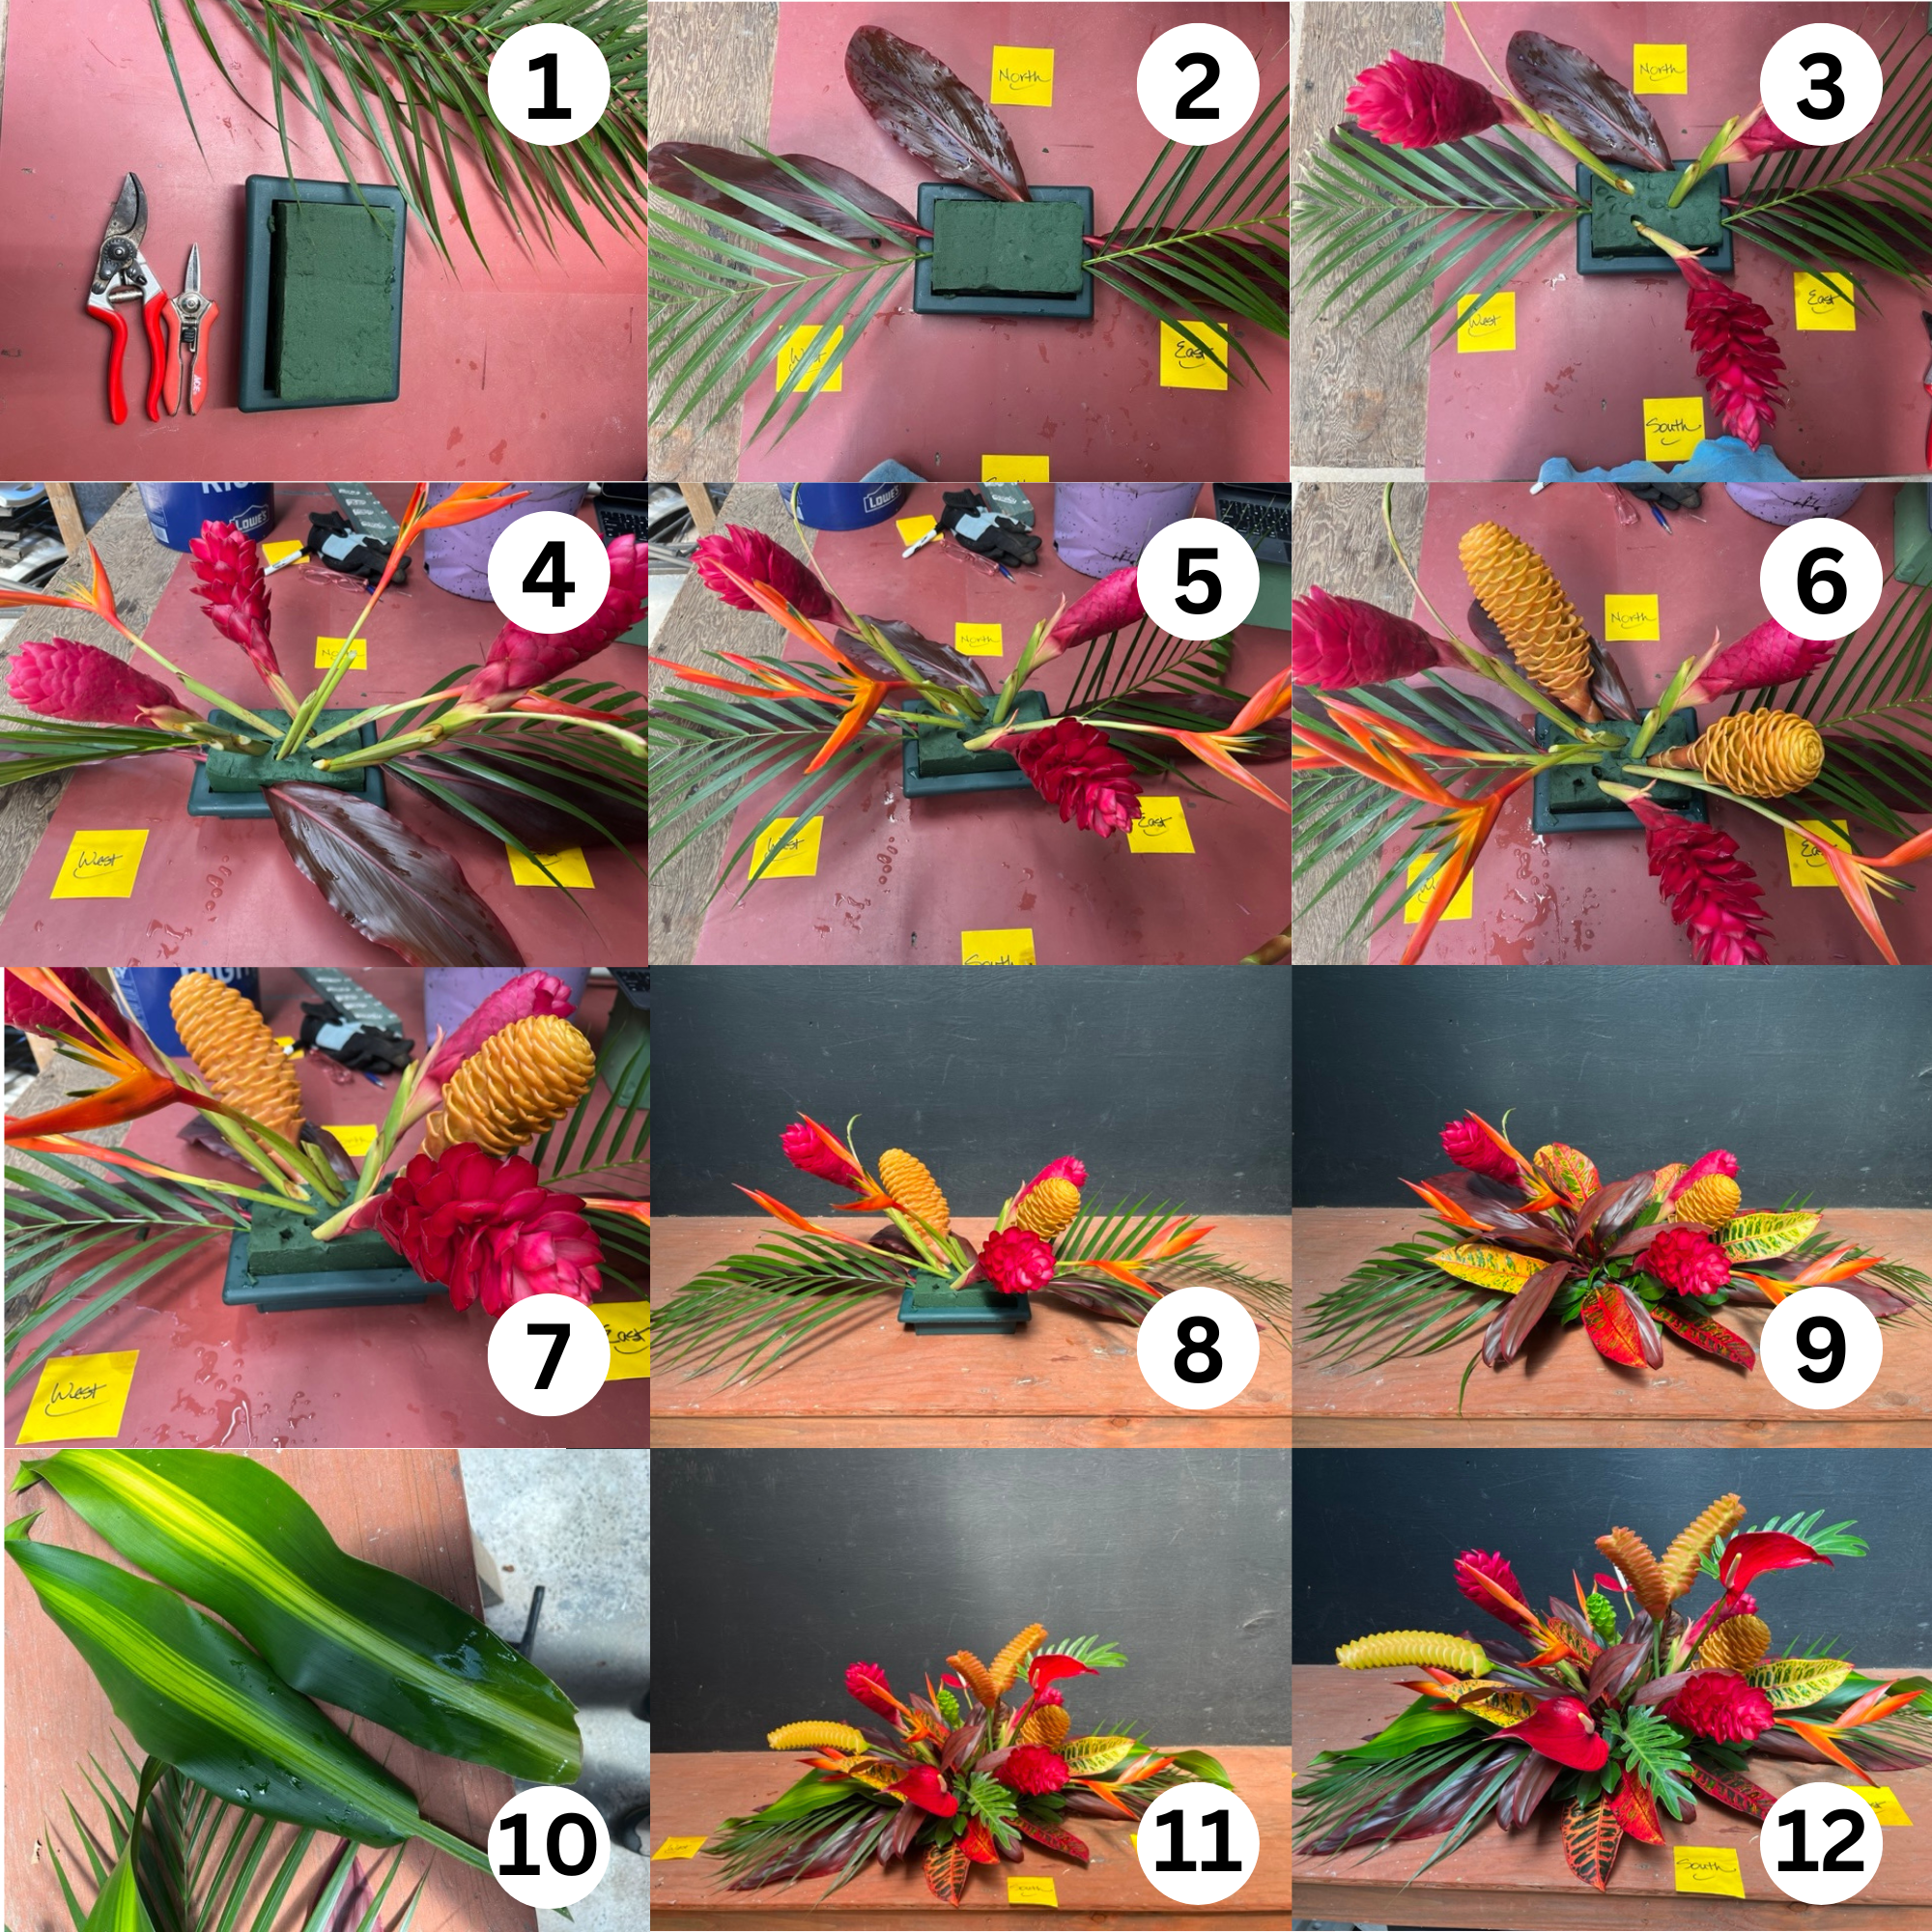
First place your oasis in the container.Then set your container on a kitchen Island or table top with lots of light so you can see what you’re doing. The surface MUST be waterproof as the water may leak out of your oasis as it is displaced by flowers. If you have garden pruners or clippers, use them. If not, a kitchen scissors or really sharp knife work quite well.
-
I’m going to talk about north, south, east and west sides of your container when describing what to do.
-
Start with your Areca palm leaves. You want about 18 to 20 inches of frond showing, but this, of course, depends entirely on your table size. Strip the leaves to this 20 inch point and then leave an additional 6 inches of stem and cut at a 45° angle. Set areca fronds slightly off-center at the west and east sides. Then cut your stem at a 45° angle, leaving approximately 6 inches.
-
Take your single three red ti leaves. Retrim each stem slightly at 45° and set one at West, one at East. The third stem set off the north side (maybe north west).
-
Next, I like to set my red gingers, so I know they’ll show to advantage. I cut the stems to between 3 and 7 inches once again at a 45°. Place one facing south, one west, and one east at varying heights.
-
Next, strip most of the stems off your orange psittacorum. I normally leave only one stem and then cut that remaining stem to about 6 or 7 inches. Place them at varying heights and directions. This is a really good time to turn your arrangement 180° to see how it looks – then turn it back.
-
Next set your beehive. I cut the stem super short; about 3 inches and set the smaller beehive towards the south east, and the larger beehive north west. (NOTE: oops! Large beehive was too overwhelming so we have deleted it from the arrangement.) I try to keep it somewhat low because I don’t want it to overwhelm the arrangement but the colors are so great.
-
Now this is the fun part. It's time to begin setting greenery and filling in the holes because you don’t want your oasis NOR the container to show.
-
I start with the miniature schefflera. Strip each “umbrella” from the main stock and clip them at 45°. Start with these first and use them as filler to fill most of your holes.
-
Then the Croton, which I find the most fun because they’re such perfect Thanksgiving colors. These I take a little more effort with. I used all of them and set them all over the arrangement.
-
Remember, it’s critical to keep turning your arrangement especially now. Don’t worry too much about filling all the holes because you still have more flowers and greenery to go.
-
Next, I do the Massangeana. It’s a great time to do it because if you feel you need more length or more weight to your arrangement, they are the perfect piece of foliage to use. In order to make it easy to stick the massangeana in the oasis, I stripped the leaf up the center, leaving the light green part as a “stock” then I clip the green leaf to where I wish it and clip the stock 45°.
-
Next comes the single green ice and the three shakers. Once again they’re great Thanksgiving day colors and I try to use a couple towards the center and one balancing out on either one of the two sites.
-
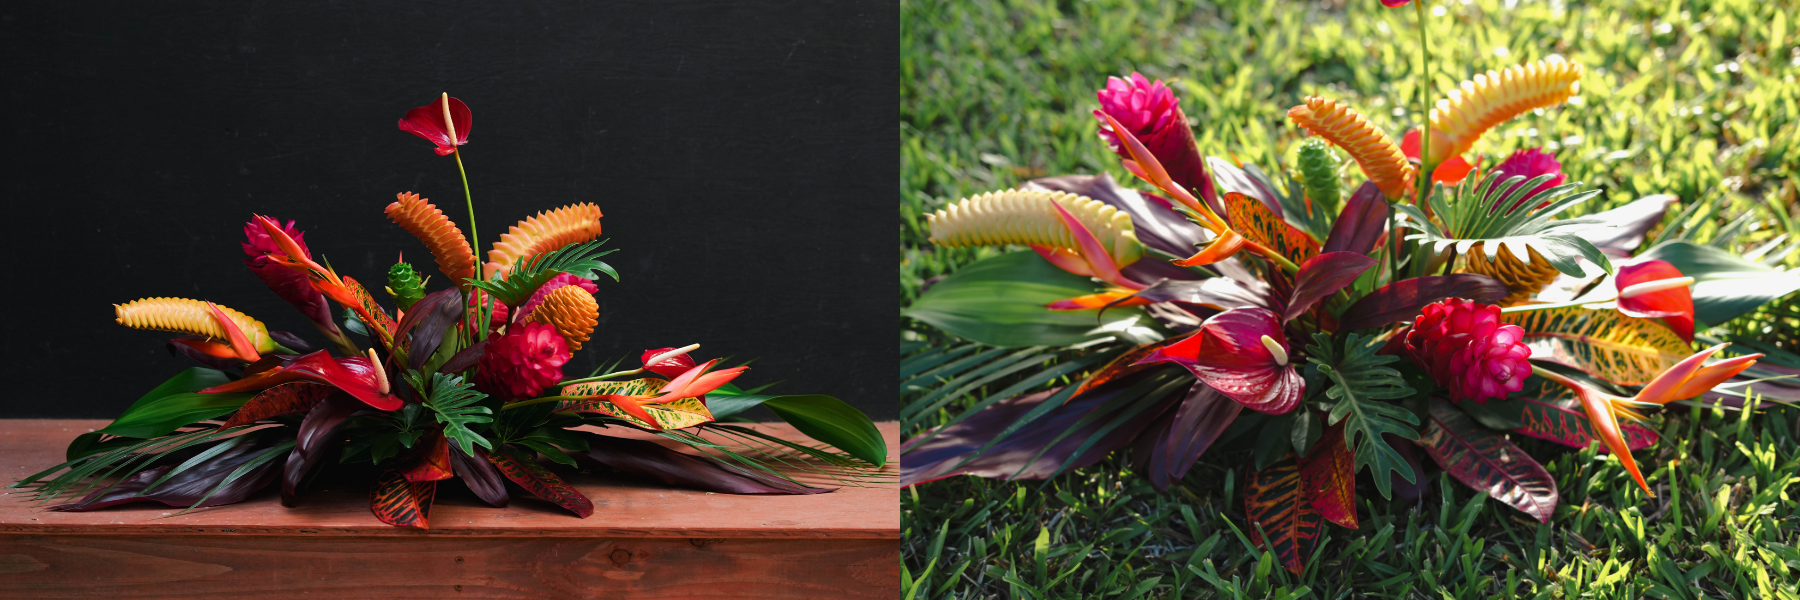
Then the Anthurium’s. Set them around your arrangement and I usually do one tall one in the center. In this particular picture the center one measures 16 inches.
-
Final tweaking: use the Xanadu greenery (the little Monstera like green or foliage with long fingers). These are one of my favorite pieces of greenery and so I really try and highlight them in each arrangement.
-
Finally, make a check for holes where oasis or the container might be showing. Use your remaining umbrellas to plug the holes.
-
Your Masterpiece is now complete. Take a bow. You have done an amazing job! Absorb all the compliments this Thanksgiving Day, and PLEASE send us a photo of your creation.


